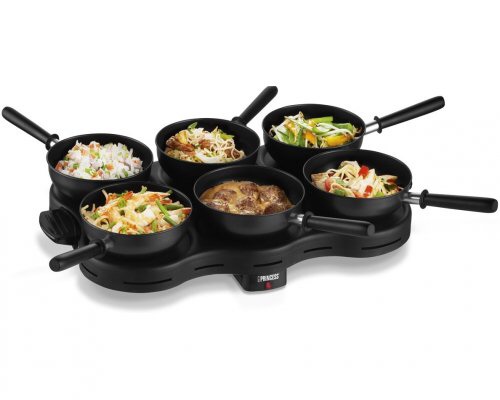
6 person table wok. Not a necessity in most American kitchens. Photo courtesy: en.factoryprices.nl
We live in an age of stuff, stuff, and more stuff! A manufacturer's job, often times, is to "create a need" where there formerly was no need. For many people, an air popcorn popper would be a prime example of that. Then, again, there are some who won't eat popcorn unless it's air popped. Years ago, when air poppers were "the latest new thing", tons of people bought air poppers, then they retired the their air poppers and went back to throwing the popcorn bag back in the microwave. The proof of that lines the shelves at the local Goodwill secondhand. Plenty of air poppers, no buyers. So what did I really need? I moved and thereby downsized my already small galley-style kitchen by 1/2. Counter and storage space for kitchen electrics is now at a premium. I love lists, so here we go! The first list is what is essential; the second list is optional. The third list is laughable - gosh, did they really make that? Essential Kitchen Electrics for the Minimalist Lifestyle I have all these and 3 of the optional ones. Microwave Toaster Oven Coffee Maker or Tea Brewer (Most minimalists won't have the single cup kind.) Hand Mixer Optional Kitchen Electrics List If you don't use it monthly, it's doubtful you need it. Coffee Grinder Stand Mixer Food Processor Blender Foreman/Press Style Grill Portable Induction Burner Bread Machine Juicer/Juice Squeezer Meat Slicer Yogurt Machine Ice Cream Machine Deep Fryer Seriously? They want me to buy this? Pizza Maker/Baker If it's not flat and round, this item is useless. Cotton Candy Maker Donate it to Goodwill as soon as the grandkids go home. Fondu Pot Skip it and get the portable induction burner instead. Hot Dog & Bun Cooker/Warmer No, seriously? Yes, they did! See...... 
Thank you Hammacher Schlemmer. Photo courtesy: hammacher.com
So how much is too much and how few are too few? Only you can decide. For me it's: Microwave Toaster Oven with Convection (I don't own an oven.) Coffee Machine with Programmable Delay Start Hand Mixer with Self Storing Beaters & Whisk Coffee Grinder which I also use to grind other things & make peanut butter 2 Portable Induction Burners (I don't own a stove.) Mini Foreman Press Grill That's 8 total for me. 3 live on the counter and the microwave is on a cabinet shelf. So what's your list? Is there a speciality electric you can't live without? Or did you find one so useless you can't stop laughing? Do share! Leave me note in the comments below. See you next year! (Lol-tomorrow!) Rose Marie :D To subscribe to Apartment Homesteading, Minimalist Lifestyle & Frugality blog click here.
0 Comments
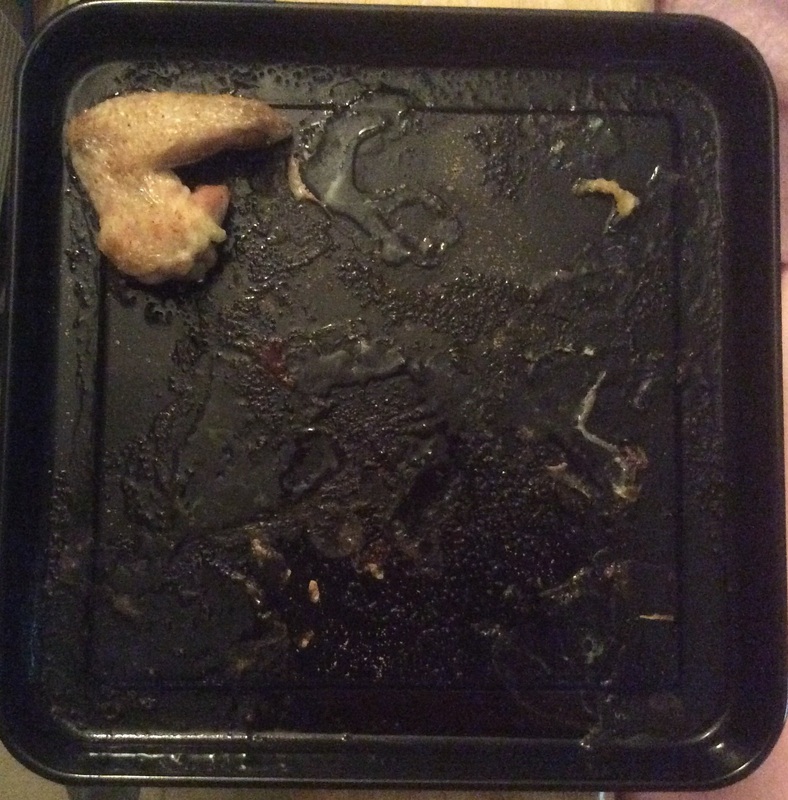
7 chicken wings, baked and done!
Eeewww! I know it looks greasy, yucky, BUT - "You're going to throw away all the GOOD STUFF!", Grandma used to say. She was so, SO right, too! And, if we do it right, making and saving the stock stuck to the sheet pan will leave the messy pan a whole lot easier to clean. Isn't that neat? (And clean, hahaha....) So, let's get to it and make some stock! How to Make Frugal Soup Stock from A Greasy Meat Pan 1--Let pan cool. 2--Boil some water, enough to cover the bottom of the greasy pan (about 1 cup here.) 3--Set the cooled pan on a heat resistant, level surface, and carefully pour the boiling water into the greasy pan, just enough to fully cover the bottom of the pan and all the stuck on bits. 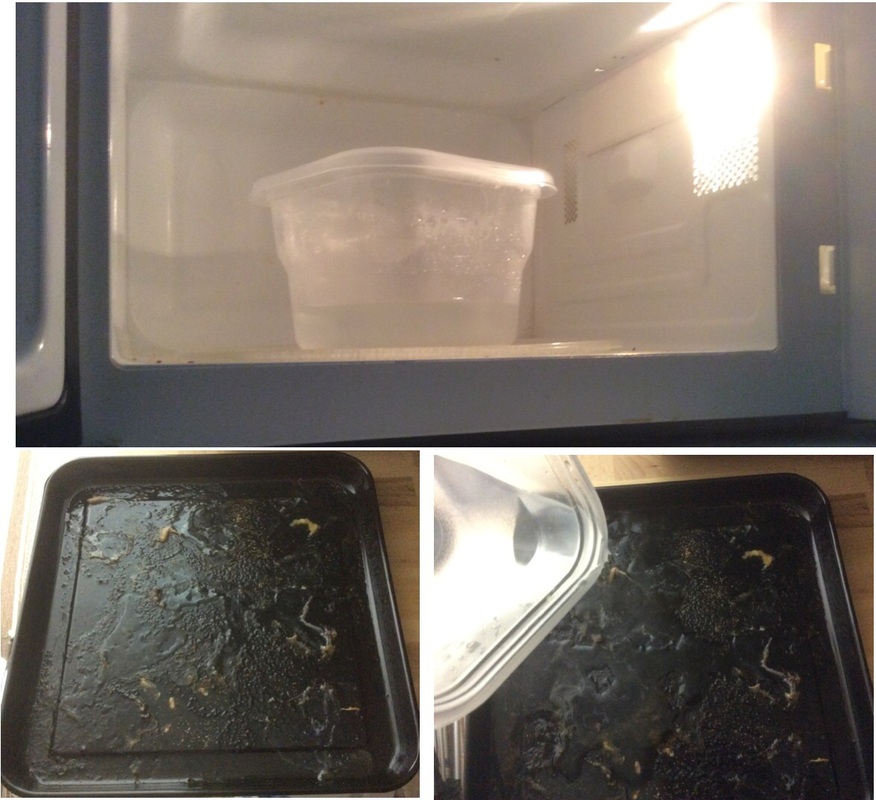
Photo top: Boiling water in the microwave, Photo bottom left: the cooled greasy pan on a heat safe level surface, Photo bottom right: carefully pouring the boiling water into the sticky pan.
4--Leave to set for 3-5 minutes, so the boiling water can do its job loosening the grease and bits. If you wait too long, and the pan cools (oops! you forgot about it!), then you're going to need to work to free the stock and grease from the pan. Work with the pan still warm, not scalding. 5--Using a high temperature flexible spatula, loosen everything stuck to the pan. Loosen it all. Now, that it's soaked it should come off in a breeze! 6--Then, scrape the grease, stock, and bits into a heat safe, refrigerator safe, lidded container. 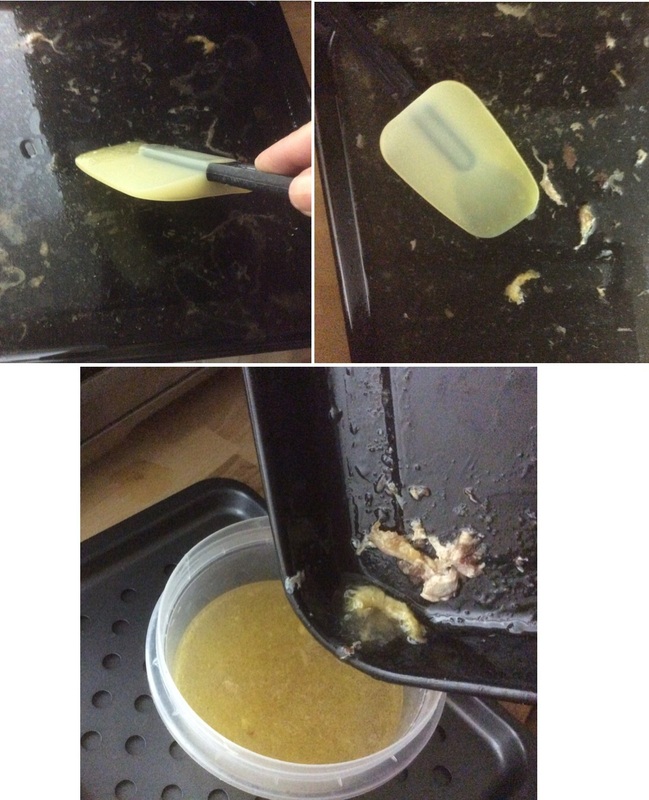
Photos top left & top right: easily loosen ALL the bits, seasoning and grease that were stuck on the pan. Photo bottom: pour grease, stock, bits, everything you can off the pan into your container.
7--I can hear you saying, "Eeeww, grease!" Be patient, we'll deal with that. 8--Secure the lid. Look at that beautiful stock! The grease has risen to the top and you can see bits floating in the stock. 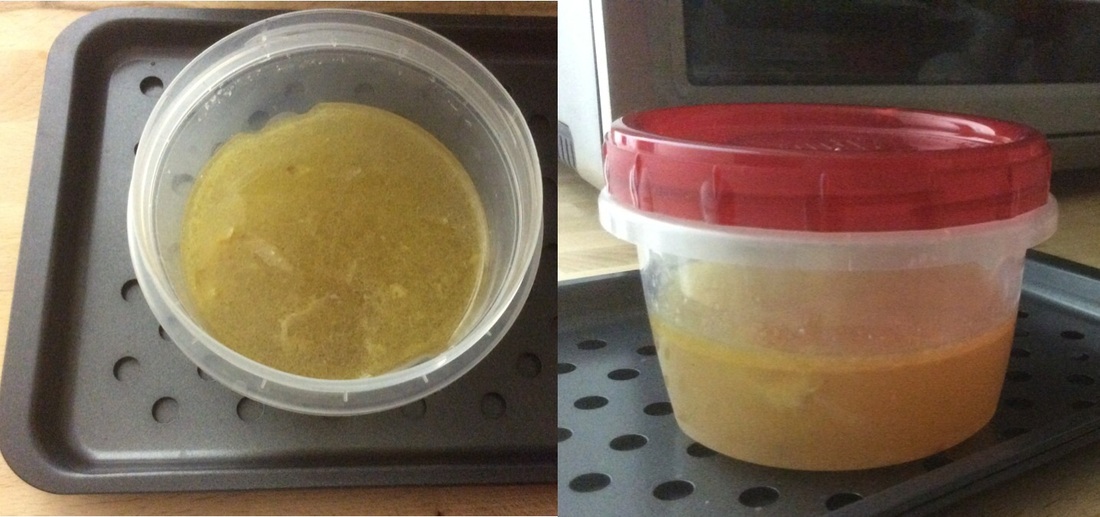
Photo left: bits in stock, Photo right: grease floating on top of stock.
9--Let sit in a level spot in the refrigerator over night. The grease will harden to a soft solid state making it easier to remove. It will be harder to remove if it congeals at an angle, so try to avoid stacking this container on something else in your fridge. 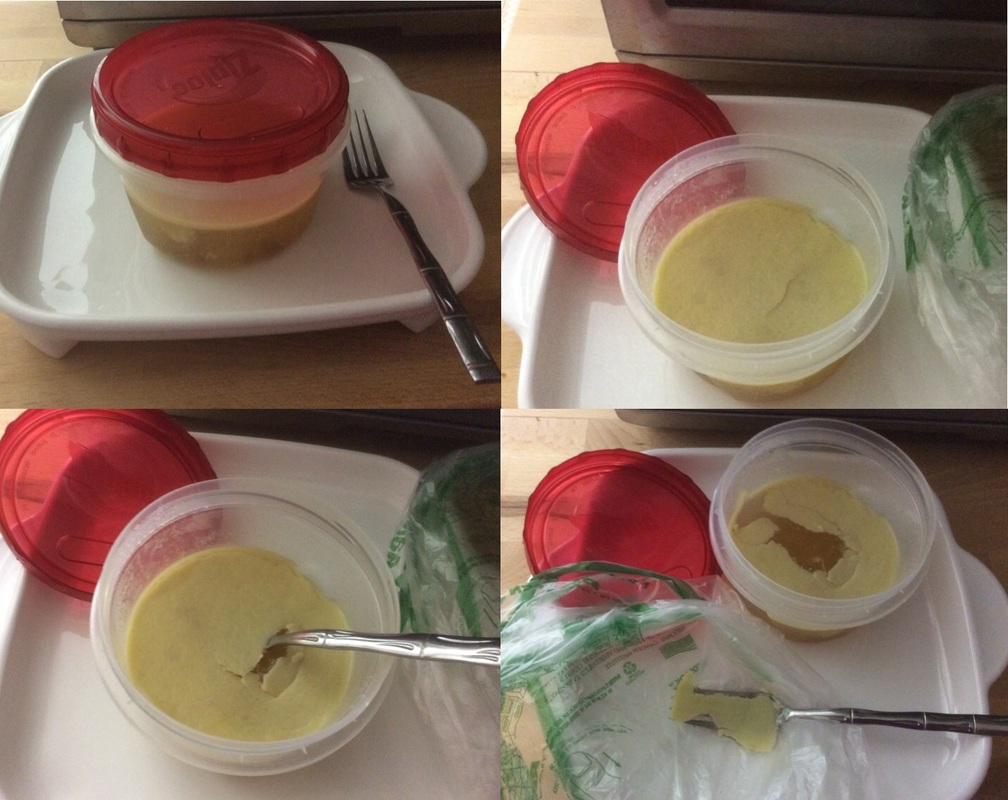
10--The next day, take it out of the fridge. Using a spatula or a flat fork, carefully lift out the thin sheet of grease. If it breaks, keep digging out every bit of congealed grease you see floating on top. Grease does not sink, so it will be easy to see. (I leave the chicken bits in the stock, but they can be strained out with a hand strainer, if you choose). The stock will gelatinous due to some of the chicken cartridge being liquified into the pan during baking. It will re-liquefy when you reheat the stock. It's this liquified cartilage that gives homemade stock that incredible mouth feel! You'll never be satisfied with canned again once you've had the real thing! 11--Throw away the grease in a bag tied shut. When the grease comes back to room temperature it will liquefy. Choose a bag without holes, and tie it tight to throw it away, or you can put your tied grease bag back in the fridge so it stays hard till you throw it out on "trash day". 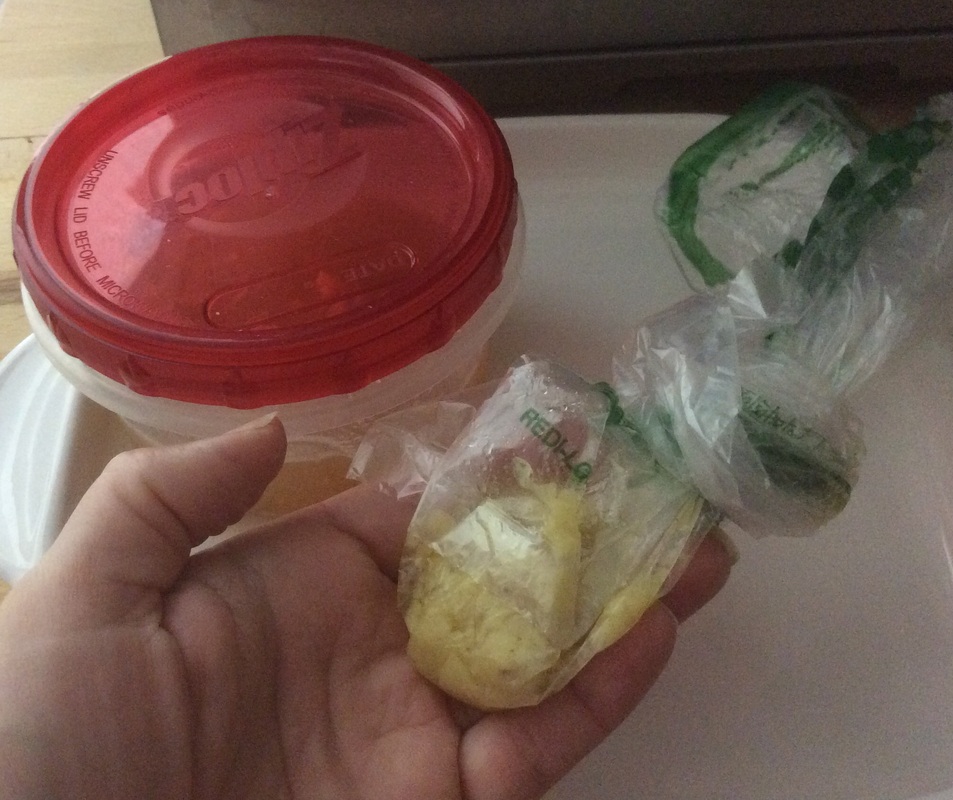
7 chicken wings produced a hair short of 1 cup of stock and I estimate between 1-2 tablespoons of grease.
12--Freeze the stock or use it! If I freeze mine, I wait to season it until I thaw it for use. When I choose to use it, I season chicken stock to taste with: --Salt (Regular salt, and sometime a bit of pink Himalayan salt. If you use potassium chloride aka "salt substitute" in higher quantities, the soup will taste "metallic"!) --Garlic Powder --Dehydrated Onions aka "Chopped Onions" $1 at Dollar Tree (see pic below) 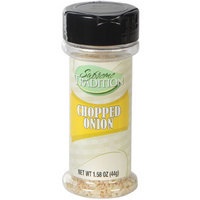
Photo courtesy: DollarTree.com
That's it! I hope it was an entertaining read. :) Leave me a comment and let me know how it worked for you, or any input or suggestions you may have? How about one last look at that now "easier to clean" stock free pan? 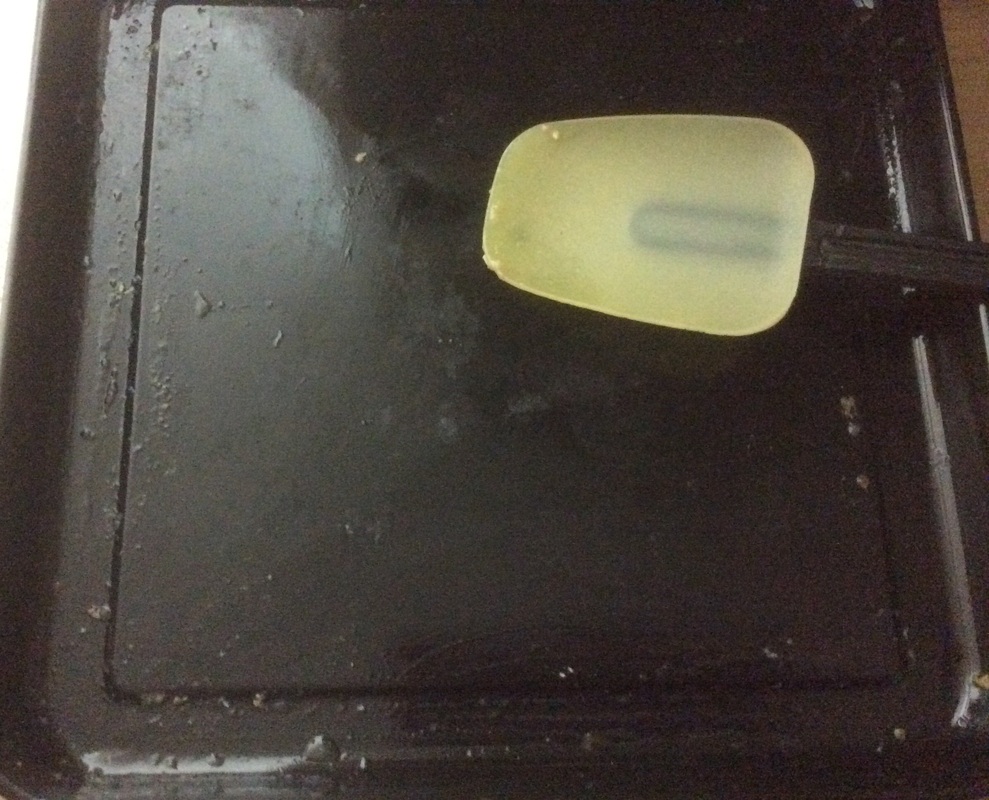
Soup is starting to sound real good about now!
Have a great day, catch you 'round the next blog post! Rose Marie :) To subscribe to Apartment Homesteading, Minimalist Living & Frugality blog, click here. Gosh, I love Dollar Tree! Rofl.... A lot of their stuff is great, some not so much. The only epic fails I found was a 2 quart lidded plastic water pitcher - way too flimsy, and a white plastic handled mixing bowl -same problem, too flimsy. Otherwise, their price is often incredible (not one thing over $1), or at least, an ok deal. You can get the bigger cans of Campbell's soup for a buck, but paper plates go on sale cheaper at Walgreen's. I've got a great memory for price points (TYG!) My fave kitchen find at Dollar Tree so far, is the Betty Crocker double ended spatula (Dollar Tree calls it a "scraper".) 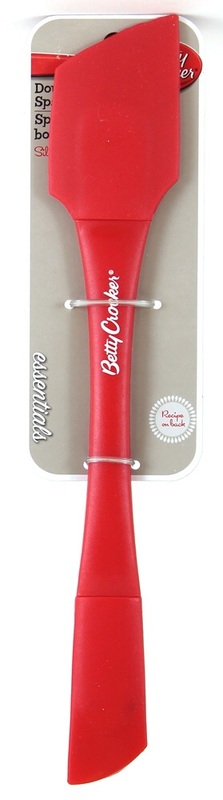
Photo courtesy: Betty Crocker
So, let's do the product review: Betty Crocker Essentials Red Silicone Double Ended Spatula/Scraper Review High temperature resistant. I've used one of these many times to stir huge stock pots of boiling soup, scraping the sides and bottom of the pot to prevent burnt soup or stews. NO melting of this spatula whatsoever! Sturdy, no bend, no break plastic. Ergonomic feel. Comfortable to use. Double ended! Minimalist me love, love, loves this! Versatile - 2 different size spatula heads: medium and narrow/small. Dishwasher safe. Food safe - ends are removable for thorough cleaning. This eliminates the bacteria trapping crevice that occurs in non-detachable spatulas where the spatula meets the handle and food particulates get trapped. After a 18 months of use, the ends stay on good and tight, no loosening, very sturdy. Top quality & CHEAP! Only a $1 at Dollar Tree and I get double the spatula for the money, with 2 different size ends to use. I bought 2 of these because I do a ton of cooking, and can go through 4 spatulas cooking one meal. Ah, the space I save too! Drawbacks: The white Betty Crocker logo on the side wears off. If that is a big thing to you, enjoy your logo while you can. The logo on mine wore off after about 1 year of use. The white flecks in the middle of the handle in the photo below are what is left of the logo after 18 months of use. 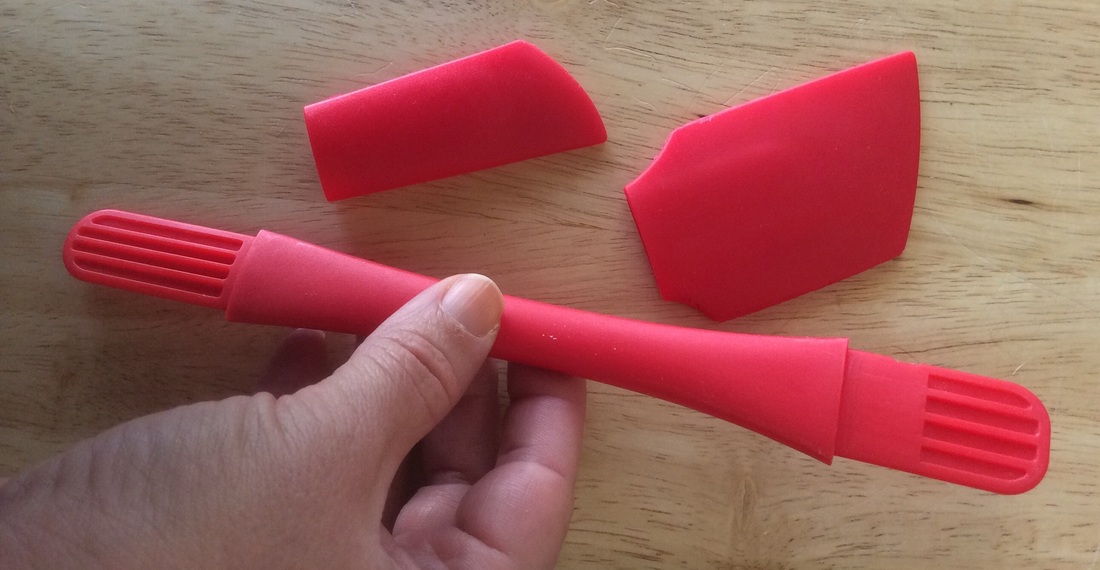
I nick the edges on these. As is true with any other silicone high temp spatula I've used, if you use them to scrape out the last bits of canned food out of the can, the edges will eventually nick up a bit, which you can see in the photo above, nearly unnoticeable on the top edge of the larger spatula head. No great loss to me, at a buck a piece, it beats nicking a $6-8 Farberware spatula any day!
Mandatory you remove spatula heads while washing/drying. Not a drawback, unless you refuse remove the spatula heads when cleaning/drying. If you leave them on you'll trap water in the heads, creating a bacterial mess. I hope this helped you save some money, and some space! What is your fave spatula/scraper? What one kitchen utensil do you love the best? Suggestions? Leave me a comment below! To subscribe click here. Time to chill out before catching up the dirty dishes, just call me...... Rose "scrub 'dem bubbles" Marie :D  Brown Tiger Oscicat, "Valentino" wrestles and chews on the feet of rowdy black & white 4 month old kitten "Buster", on my futon. Ah, the joys of Apartment Homesteading! I love my condotel! Some in the tiny house crowd believe it's too small a space for pets, but I whole heartedly and lovingly disagree. Pets are easier in a small space, there's less square footage to clean up after them! :D I also take them out for walks on their leashes. Leash trained cats, seriously?!? Yes, seriously. Check it out! CertifiedServiceCats.com Anyway, back to animals in a tiny home...... Any animal left to the same routine all the time will eventually get bored. When you take them out for a change of scenery, or have friends over they can interact with, a change of pace will make life for you and them more fun and interesting. Living with animals in a small space means they won't likely get as much exercise, so engaging them in play is something I consider essential as well as loads of fun. Cats are packed full of entertaining behavior. A barrel of laughs!  Buster has wiggled out from under Valentino, and gives the larger striped cat a few playful nips back. I'm fond of lists, so here goes: Tiny House Indoor Cat's Activity List Scratching post with an attached toy on top. A home without a scratching post is a disaster waiting to happen! An attached toy means your cat will always be able to find, at least, this one toy. Compact in design, this one has the attached toy and a perch point to sleep in on top! 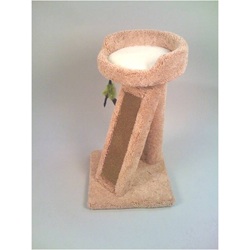 Photo courtesy: PetSuperstore.com A smaller space shouldn't mean less toys! Think outside the usual pet toys for extra fun! This is Valentino's fave type of toy, a non-toxic, kid safe, wiggly throw toy. It lights up with various color patterns on impact. He's figured this out and can amuse himself for nearly an hour just flinging his toy around to watch it light up. He also brings it to me so we can play fetch with it. Take a look at his faves: 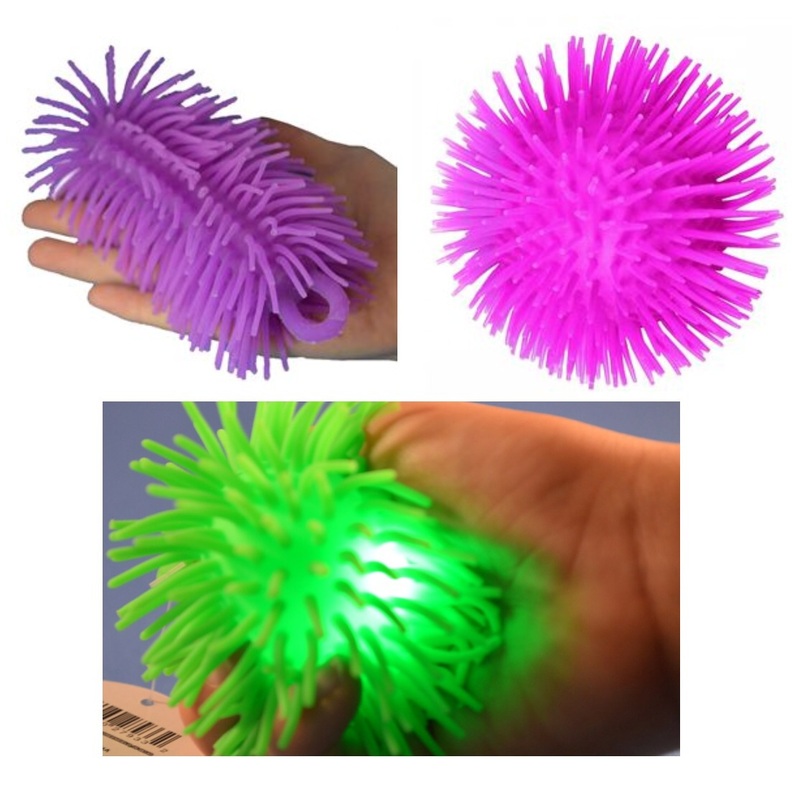 Photo courtesy: SquishyMart.com. They light up on impact when thrown. Designate a play time every day. Valentino, Buster, and I play every night for 30 minutes to 1 hour, often all at once, sometimes in 10 or 20 minute blocks. It depends on how long a work day I've had! My stamina may not be so good sometimes, theirs on the other hand, is always up for "once more, mommy!" Designate a quiet time daily. A good petting, massage, brush out, just chill for a while. It trains your pet to relax when you want to relax. Pets, like 5 year old kids, need to be taught to "wind down" at least 1 hour before lights out to bed. This is crucial if you plan on getting a good night's sleep in your tiny home. No, no, no, playtime within 1 1/2 hours of bedtime! Skip teaching your fur balls this and they'll teach you what a 5 AM wake up call is! In 400 square feet or less, there is only one room you can quarantine a rowdy animal in, and that's the bathroom. The entire remainder of your home is the only other "room" - living, sleeping, cooking, everything room. In a tiny house, quarantining the brat cat in the bathroom will do you no good! In that small space you will hear them cry, dig, scratch, whatever, it's still no sleep for you! This ends the list. The "Cat Mom" in me has to show off Valentino & Buster's recent cute kitty pics:  When cat batteries fail....  Oh, WAIT! Just a little bit of juice left, and streeetch!  Nope, cat batteries definitely dead this time, Buster's a goner..... On a side note:
If you, or anyone you know, is interested in a leash trained kitten, Buster will be available for adoption in about 2 months. Call me, I'd be glad to assist. 386-301-6065 Adoption proceeds are scheduled to go to a local non-profit. (I am an animal trainer & cat behaviorist.) If you've enjoyed reading my blog as much as I enjoy writing it, why not subscribe? I also would love to read any comments you have; feel free to post them below. Somehow, I'm craving tuna for dinner. Do you think I might end up with 2 furry and hungry dinner guests? Peace for the New Year, Rose Marie As I mentioned before, I live in a small space - 360 square feet! No room for a big food dehydrator. On the other hand, I love minimalism! :D I've also always wondered, how much $$$ in electricity do those things use? Is it worth the added cost? Are they noisy? Then, you gotta wash them. Boo! Hiss! (I have no room for a dishwasher, either, so it's all hand wash!) So, onto drying mushrooms...... Easy Dried Mushrooms 1--Wash mushrooms thoroughly. 2--Find a sheet pan or preferably a slotted (open slits) roasting insert pan to use as a stable drying area. I prefer the slotted insert pan for ventilation/faster dying time; you don't need the roaster pan, just the slotted insert. I suppose you could use a cake cooling rack, but I prefer something with edges. 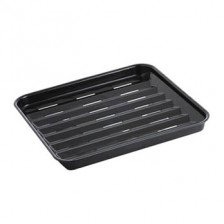
Stock photo of a Breville roasting pan insert, identical to the one I used for this. Photo courtesy: Breville USA
3--Spread a clean paper towel or unfolded paper napkin on top the pan. 4--Slice mushrooms approximately 1/8 inch thick or less to suit your preference. I have found if I slice them over 1/8 inch thick they don't dry as nicely or as quickly. 5--Arrange the sliced mushrooms on the sheet pan so they don't touch each other. 6--Keep the sheet pan in a clean, dry, not breezy area. A good breeze will flip them off the pan once they're dried, not to mention breezes often bring flying particulates! 7--Mushrooms should be fully dried in 18-36 hours! 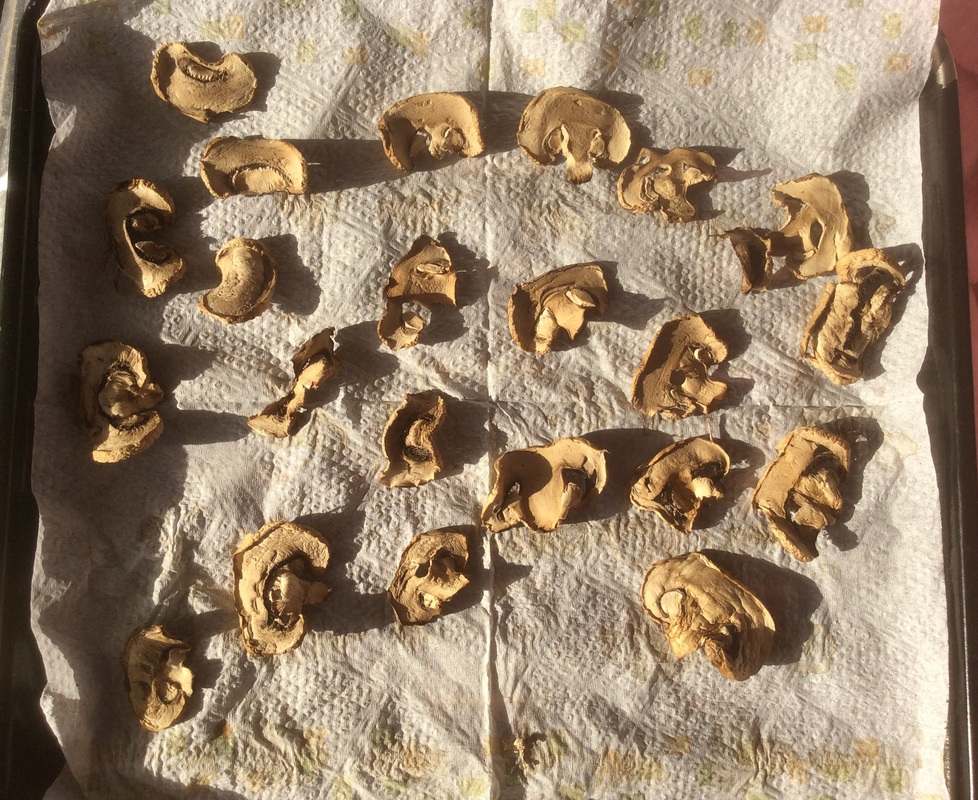
Dried white mushrooms on a napkin on my Breville slotted roasting pan insert.
8--Place dried mushrooms in an airtight container for use later in soups, gravies and cooking. 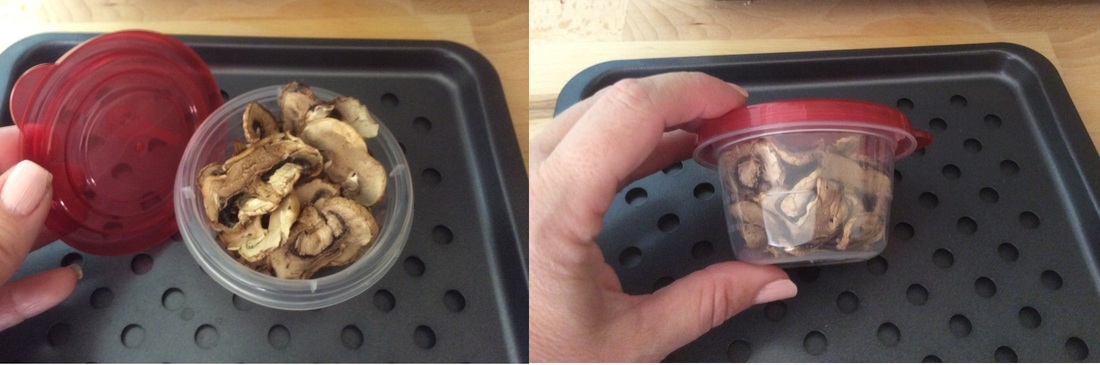
On an extremely frugal note, not only can I skip washing a food dehydrator this way, I also set aside the used and now dry "mushroom napkin/paper towel" to pick up spilled food and cat messes off the floor, suhweet!
Any other "cheapies" out there besides me? Any decent dried mushroom recipes? Leave me a comment down below and let me know. I love to learn new things! Have a blessed, blessed day. :D Hugz, Rose Marie 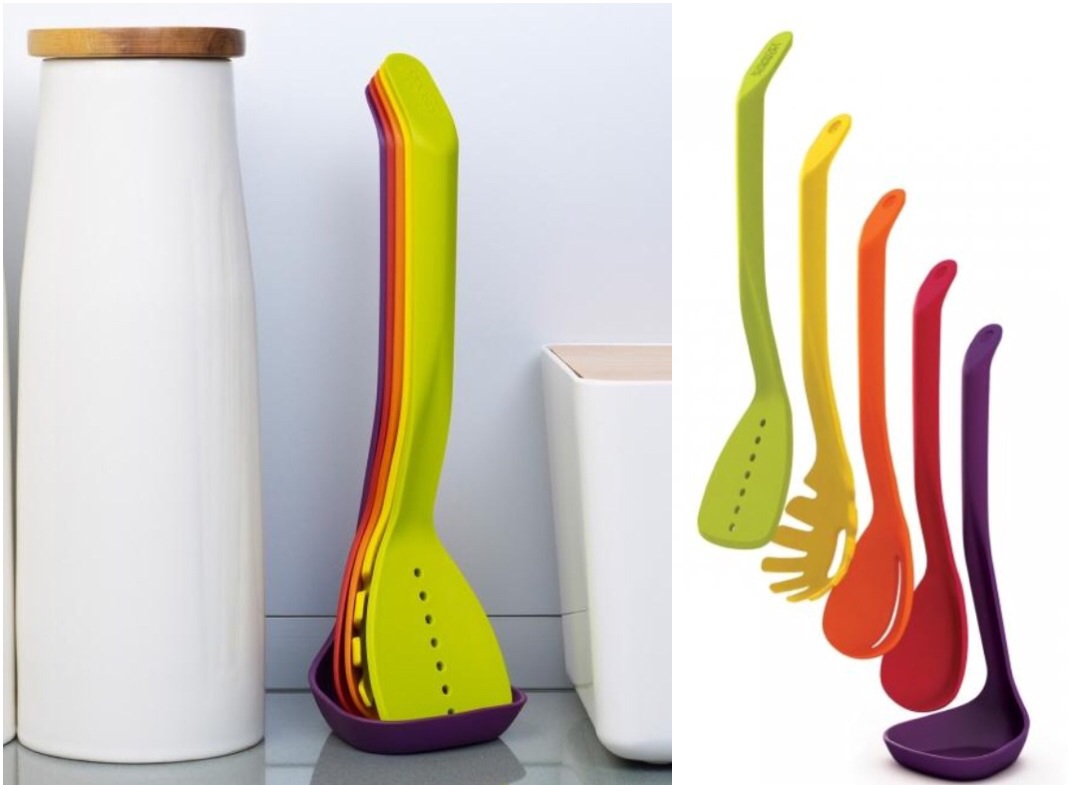 Photos courtesy: http://www.josephjoseph.com/product/nest-utensils Photos courtesy: http://www.josephjoseph.com/product/nest-utensils I am heading toward a minimalist lifestyle. In October 2013 I sold my 1250 square foot beach front condo and moved into a 360 square foot "condotel". One room. It was formerly a hotel room, the kind that had a kitchenette and 2 full size beds. I'm still beach front; I'm not leaving my ocean! I spent 2 months prior to closing on the new beach front condotel, giving away the majority of my possessions (I had no idea The Lord had blessed me with this much stuff!). While doing that I also researched online all the really cool things I could acquire that took up a minimal of space. I purchased a Nest Utensil set by JosephJoseph from Bed, Bath & Beyond on cyber Monday of 2013. I've had and used these for over a year. I'm still in love with them! JosephJoseph Nest Utensils Product Review They are made of a dense sturdy plastic that is obviously, by feel, a way better, more refined quality than what I've used before. I usually use the mid-priced stuff from Walmart or Farberware. (I still love my Farberware hi-temp silicone spatula!). The JosephJoseph Nest Utensils are also very, very faintly rough in texture. They're not the usually smooth, slippy, slidy, stuff most kitchen utensils are made of. They're comfortable on the hands, surprisingly easy to clean and don't pick up stains, even if I leave the slotted spoon or spatula in dried spaghetti sauce for 2 days (oops!). Amazing! They are extremely compact storing. They stand vertically on the counter and link together magnetically via a spot in the very end of the handle (note spot on end of the yellow spoon in the photo below). Minimalist me is happy dancing over this compact design! (They also look incredibly cool!) 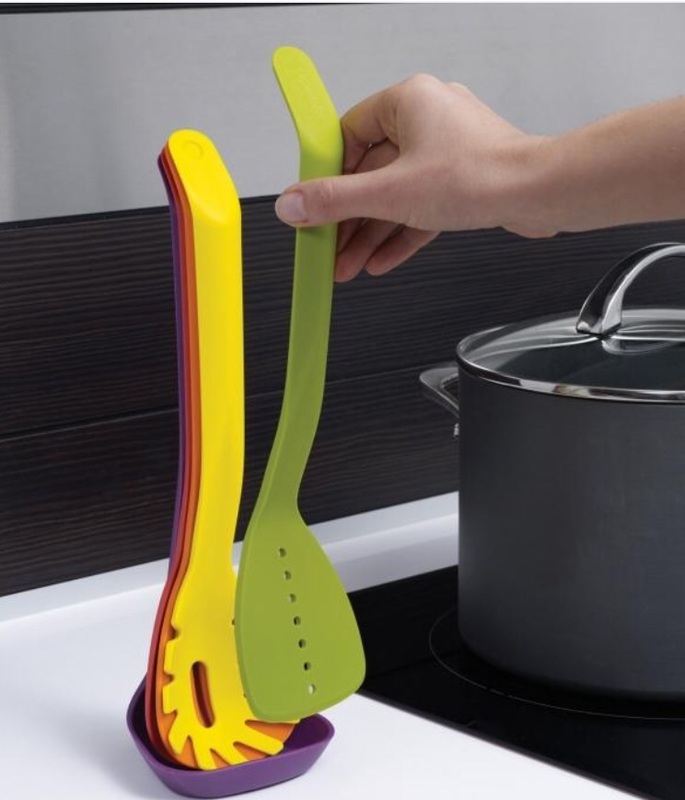
Photo courtesy: http://www.josephjoseph.com/product/nest-utensils
They're durable enough for me, which is rare. I have broken good quality stirring spoons a few times before. I've melted every one, with pot rim marks on the back of the handles. I routinely fry the end of as spatulas. I throw out spatulas on a regular basis for this reason - I'm very hard on spatulas! I have yet to put any pot marks on these, and it's been a year. They never, never bend due to too much weight, so I'll be surprised if I ever break one! I did singe the very tip of the spatula, just a hair. (See pic below). Considering I've done far worse to every single spatula I've ever owned, I'm ecstatically pleased this one is so much harder to kill! 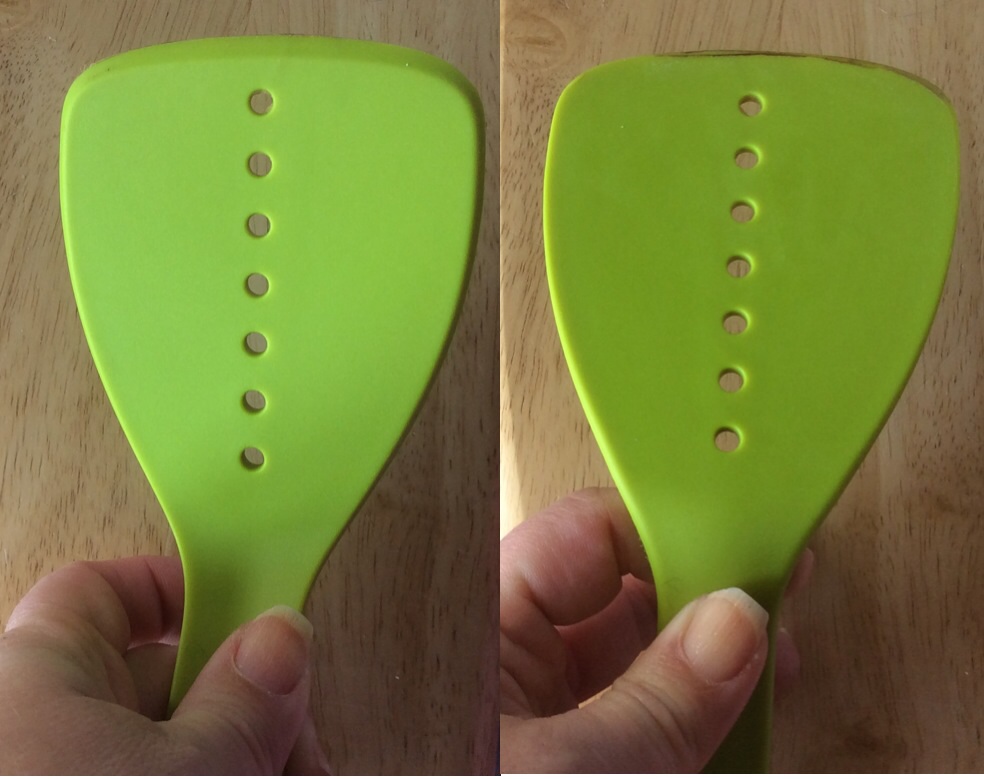
Lightly singed: left, top of spatula, right underside of spatula. I got through 8 months of use before I did this.
Drawbacks:
1--Pricey at $25 for the 5 piece set, unless you usually buy higher priced utensils like Farberwear. 2--Likely needs to have counter space. The magnets that lock together on the ends of each utensil work great standing up, but aren't strong enough to hold together in a cluttered utensil drawer. If they had stronger magnets they'd play hell in use and washing, so I'm glad they don't. You might be able to keep them magneted together in a drawer if they had their own good sized slot to rest in. They are likely to still save you a great deal of drawer space stored this way. I love them on the counter, so it's no big issue. 3--There are no replacement utensils available for this set. But, who if any, kitchen gadget manufacturer will sell you just one missing measuring cup? Well, that's the end of the review! Please leave me a comment with how this worked for you, or any compact kitchen stuff you use. I'm still searching for the best and could use all the help I can get! What worked that you use? What did you buy that didn't work out? Until next time, have a blessed, blessed day! :D Hugz n' love, Rose Marie One of my fave things about the local Flea & Farmer's Market is the produce vendors that have "buck a bag" specials. Frequently they are not as pretty as the other produce, but they're delicious and cheap! More often than not, the selections in those clear plastic bags are local Florida produce. Only one problem with my money saving stash of veggie goodies - they have a reduced "shelf life" or a few bumps here and there. Bumps I can cut off, no biggie. The price is so low, and I get quite a bit, so a bruise here or there is acceptable. The short time until spoilage is a big deal. Years ago when I tried to do this with fresh green beans from my organic, naturalized garden, it went horribly wrong. I rinsed and cut up my fresh green beans, drained them and put the cut up pieces in a zip freezer bag. Little did I know, that is wrong, wrong, wrong, wrong, WRONG! Why? When you go to thaw them in the fridge before cooking, the bugs come crawling out ALIVE! Yuk. YUK! When you freeze fresh produce without proper prep, the bug eggs you can't see come to life upon thawing and hatch in the fridge. Eeewwww...... I had to find a better way. I didn't like the idea of going from freezer to boiling water either, not after seeing what was in those green beans! The basic "how to" I learned from my neighbors back then, long before the days where I could look it up on the internet. This became my adaptation over the years: Easy NO Canning Preservation of Green Beans 1--Wash and cut up beans, removing bad areas if any. 2--Cut up in edible size sections. 3--Boil enough water in the microwave to cover the cut up green beans. (I usually use a 2 cup microwaveable measuring cup for this.) 4--Pour boiling water over green bean sections. 5--Let stand for 5 minutes. Beans will initially "bubble" a bit. 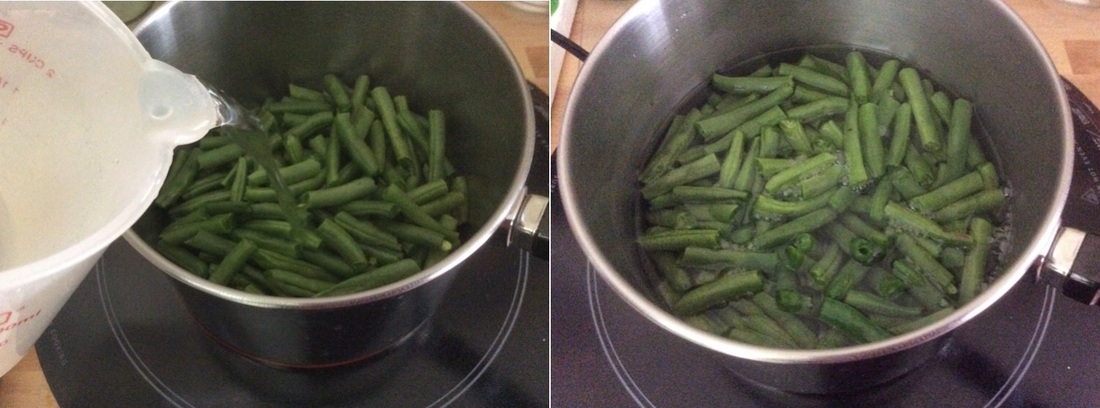
6--Carefully pour hot water off green beans and re-boil in microwave. 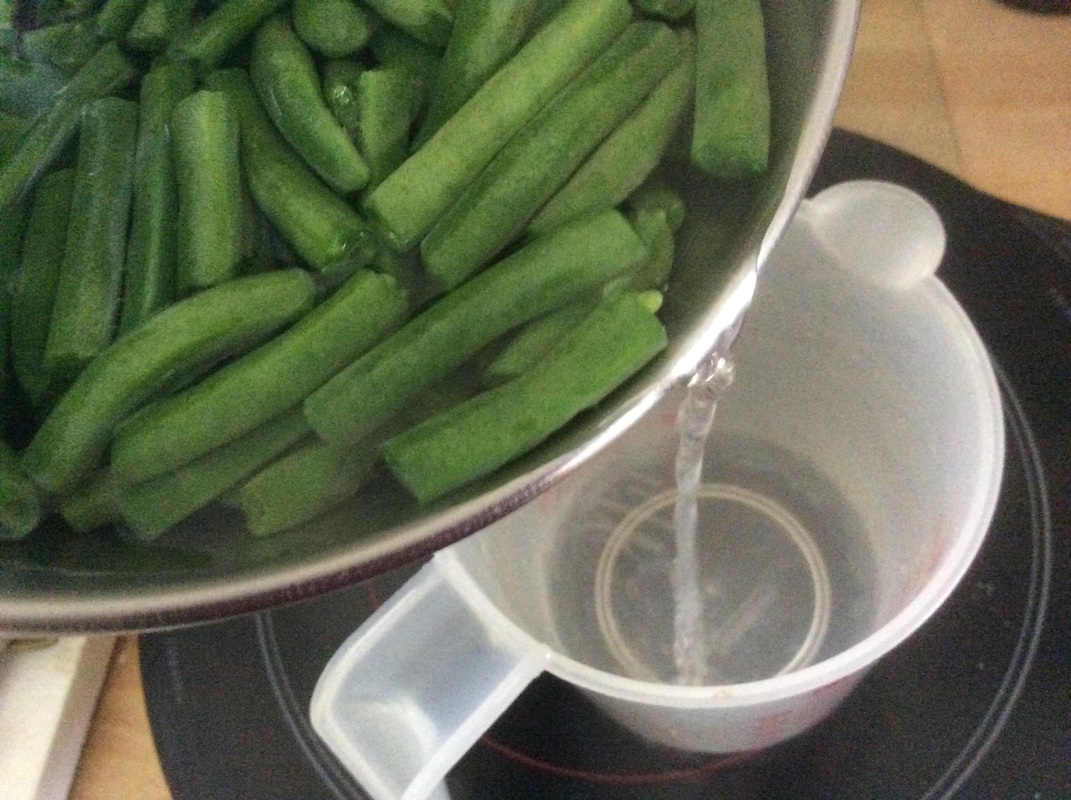
7--Again carefully pour re-boiled water over the green beans. The beans will not bubble this time.
8--Let stand for 10 minutes. 9--Drain green beans and reserve green bean stock for later use. Refrigerate or freeze stock. 10--Freeze cut green beans in a zip bag, pressing as much air out before sealing as is possible. Too much air in the zip bag will lead to ice crystals followed by "freezer burn". (I usually put 1/2 the green beans in the fridge to cook and eat the next few days, and the other 1/2 I freeze). I know the frozen beans will last a month. I usually eat them by then. For those who like raw foods, and I eat quite a few foods raw, these are great straight from the fridge, skip the freezing! (The short cooking we did, also known as "blanching" can kill the bad stuff, but the beans will still be very, very crisp.) Please leave me a message below and let me know how this worked for you! Any ideas? Suggestions? Leave a message - do share! See ya 'round the next post, Rose Marie ;) 
I have this incredibly lovely boy-cat Valentino. As well leash trained he is, and trained to stay off the counters, he can't seem to resist the bathroom sink when I'm not home. For quite a while I had a huge goldfish named Blanche in a tank on that counter, and from what I could guess, Valentino passed some of his "alone time" while I was at work, curled up literally in the bathroom sink watching Blanche swim around. Poor Blanche passed away. But I'm still coming home to cat hair in the sink. Every once in a while I find Valentino standing in the sink, head and ears pointed straight at Blanche's empty tank. I wonder if he misses her as much as I do. The filter is still bubbling away in the empty rank as I contemplate what fish to put in it next. But back to the Hydrogen Peroxide and cat hair. I frequently come home to my 360 square foot apartment to clean out a sink of cat hair. I love Clorox Cleanup. I usually have plenty. I usually get it for free. I make extra income gathering up a crew to empty furniture and everything else out of beachfront condos. I keep the contents. I usually have TONS of cleaning agents. Business has slowed. I ran out of Clorox Cleanup. Turns out I still had a 3/4 full bottle of hydrogen peroxide I bought for $1 at Dollar Tree to kill the bugs on my Basil. (I grow basil in a huge pot with other edibles on my balcony overlooking the ocean.) I also still had the $1 spray bottle I poured my hydrogen peroxide/water bug killer into. Now this was way too easy..... I unscrewed the sprayer out of the $1 bottle (after washing it) and screwed the sprayer into the Hydrogen peroxide bottle. I was frugal enough to screw the peroxide cap (after washing it ) onto the rinsed $1 bottle. 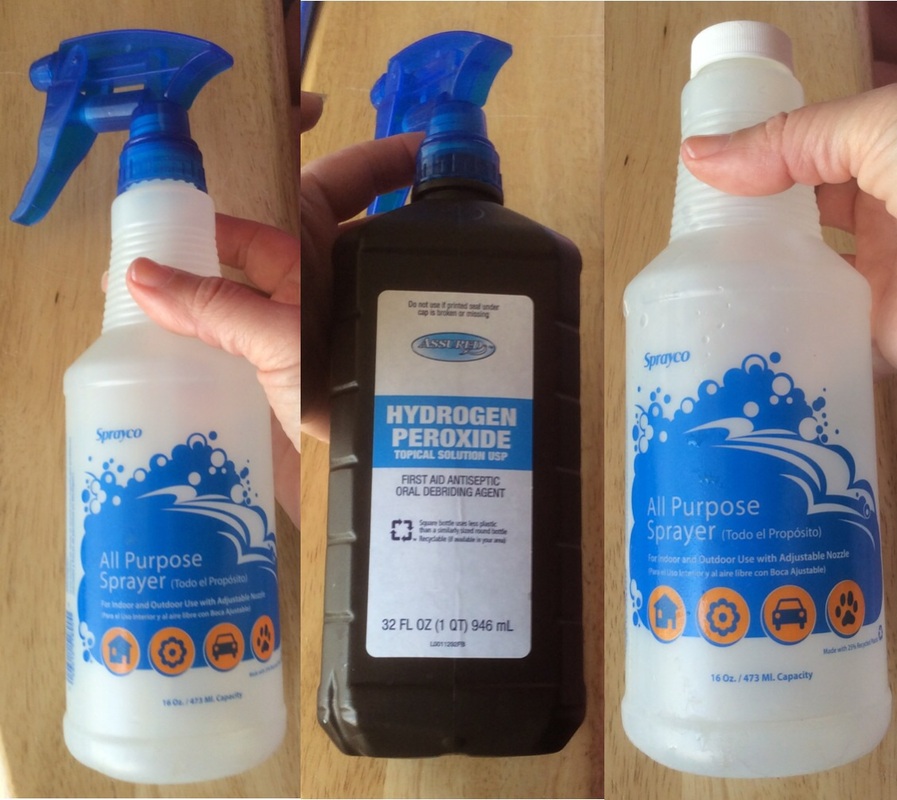
Left photo: $1 spray bottle from Dollar Tree, Center Photo: $1 Hydrogen Peroxide from Dollar Tree with blue sprayer from $1 sprayer bottle. Right photo: the cap from the Peroxide fits the now "sprayer-less" bottle.
Voila! Disinfecting Hydrogen Peroxide spray in a dark bottle that will keep it from bio degrading, and a nice bottle with lid, if I need to make some more cleaning agents later.
For the more fun stuff on Hydrogen Peroxide's disinfecting/antiseptic uses, click here. To answer the nagging question: yes it's the 3% solution Hydrogen Peroxide used straight up, no dilution. I give it 30 second to work and wipe it off. The sink is cultured marble and it looks fine. On a final note Hydrogen Peroxide naturally breaks down to water and oxygen when exposed to light and air (thus the need for a dark bottle). Hope that helps. A frugal and minimal-a double hitter! So what interesting uses do you have for hydrogen peroxide? What natural, frugal and minimalist cleaners do you use? How many different bottles of cleaner are in your home? Leave me a note below and tell me what you think! I love to learn hew things. :D Wishing you an easy cleanup of whatever it may be and a nice glass of red wine afterwards, Rose Marie :)  Photo courtesy: http://shop.farberwarecookware.com/Cookware/Farberware-Classic-Series-2-Quart-Covered-Saucepan-with-Double-Boiler-Insert-Silver-50057.html#product-overview Ah, Minimalism.....it sounds so pretty! Clean, streamlined, functional. My goal, all mine! [insert maniacal laugh here] But I jest. Or maybe not? Back to the story of "Downsizing My Life", and I don't mean that evil 4-letter word d*et! In October of 2014, I went from living in a 1250 square foot beach front condo to a 360 square foot 1 room condotel. I donated the following to charity and friends, prior to the move: 2 large skillets, 1 smaller skillet, cake pans, sheet pans, a blender, my microwave (there was already a smaller one where I was going), toaster oven (I was planning a on a new one, later I'll review it for you), mounds of utensils, hot pads, mitts, kitchen towels, a growing pile of plastic storage ware (both the bought kind and recycled tubs, etc.), mixing bowls, tins, you name it. I also gave, to a close friend, my prize Farberware double boiler! Not a mistake, but intentional. I was going to buy a couple of those PIC Induction Burners they keep advertising on TV. I love to cook and could think of no better new "toy !" than a couple of those sleek digital thermostat display thingies! I did get 2 of those cookers and I'll review them here at a later date. Guess what I learned next? You need special "Induction Cookware" for those burners. They can't use what I already had, they won't work, they won't heat up at all! Any cookware that is magnetic, for example cast iron, will work on induction burners. I tested all my cookware with a strong magnet. There was not one, not one, pot or pan I could keep that would work. So, I gave up my beloved 2 Quart Farberware double boiler. Since I hadn't bought new cookware in forever, I decided maybe there was something better out there than what I had. I was trying to stay compact and minimal in kitchen storage space, but still highly functional and affordable. My long, long search was in vain. Since when did having a double boiler in your cache of cookware become unfashionable? I'm in my late 40's. Am I that "unfashionable" already? Lol! I hope not! Not only were they difficult to find, they were too big when I did find them. Or way, way too expensive. Like $200 too expensive! Back to my trusty Farberware! It turns out that old 2 Quart Double Boiler now was now available in Induction, and Farberware was closing out the non-induction cookware in their Farberware Classic line. When I arrived at Bed, Bath & Beyond with my 20% off coupon (always be frugal!) the Induction Classic was full price, the old model was on sale. I now have my double boiler back, induction style! Farberware Classic 2 Quart Double Boiler Review It takes up less space and gives you 2 pots to work with. The insert top pot also has a magnetic base, although it visually doesn't look like it. You can store the lid in the top insert pot either right-side up, or upside-down to put the top knob inside the insert pot, thereby taking up even less space. Both pots heat up quickly and evenly without any "hot spots". Both handles and lid knob stay cool. The set is incredibly durable. In 20+ years of my mom, my grandmother and myself using these the handles never cracked chipped or broke. As many times as we dropped all the pieces, they never dented. The lid fits either pot perfectly, and is contoured to force condensate not steam out the sides, but run down back onto the food below, thus keeping cooking food from drying out. They're easy to clean - even burned on rice! Let to soak a few and the burned rice easily comes off - no elbow grease needed. (I have a tendency to scorch rice, oops...) They keep food in the fridge without adding a metal taste to the food. (Am I the only one in a hurry who has been forced to do this?) They are aluminum free, made of solid stainless steel. They are priced just right at $39.99 the set. (I used a 20% off coupon in store at Bed, Bath & Beyond and saved $7.99, paying only $32 for the set.) Drawbacks: 1--The exterior mirror finish and hard durable plastic handles and knob stay bright and dark when hand washed. My mother used hers for a number of years before she passed away, then I used it for another 10 years before I left it behind. A dishwasher will dull the mirror shine quickly and eventually, given enough years, the handles on my momma's double boiler "whited out". It looked terrible, but it worked fine, didn't get brittle or crack. It just looked odd.  Thick Magnetic Induction bottom on lower pot. I hope this helps in your decision making process, if you are indeed shopping for new cookware. Otherwise, I hope you found it an entertaining read. :)
Please feel free to leave a comment below. What is your fave compact cookware? What one pot or skillet can you not do without? Let me know if you've found "the perfect compact cookware"! Blessings for a great day, Rose Marie :D  I live in 360 square feet. I love using every bit of whatever I buy or get. Use it up, wear it out, make do, or do without. (To be honest - the "last life left" in my clothes gets given away to charity; my friends don't wear my size.) Food dehydrators are HUGE contraptions to put in a 360 square foot space, where space is at a premium. Having "more stuff" also encroaches on my goals toward heading toward a minimalist lifestyle, besides I absolutely love Apartment Homesteading! So let's stretch out the lifespan of my spring onions. I live on the beach, a very high humidity area. So high is the humidity, that I have a good size dehumidifier in my small space. I keep it set between 40%-50% humidity. Those low humidity levels kill all the fleas my trusty leash-trained cat Valentino might pick up in our wild outdoor adventures. Fleas usually die from the drier air within 48 hours. Valentino is pesticide free, naturally! Humans thrive best in humidity levels between 40%-60%. Below 40% or above 60% and humans will start to get respiratory issues. I've dehydrated spring onions naturally in several different climates and humidity levels, including homes in Missouri and Kansas during the summer with the windows open to the natural air for days. Dehydrating Spring Onions, Naturally Rinse spring onions in cool water. Cut in short sections, 3/4 of a centimeter long (3/4 the width of an M&M candy). Separate the rings on the white part of the onion - they will dry out faster. Spread out on a fresh clean napkin or paper towel. Leave out to dry in a "still area" - no strong breezes, or your onions will blow away. You can check them several hours later and re-position them to speed drying time and decrease sticking to the paper. 24 hours later, shake/pull the onions off the paper. Store in an airtight container. Mine keep for up to 18 months. Great in soups! 2 Ways stretch out the 'shelf life' of fresh (not dehydrated) Spring Onions Rinse first. 1--In a cup, in the fridge with just enough water to cover the roots. Change the water every other day. Cut off the roots and the rest of the plant will take up more water easily. You can also cut off and dry the tops, leaving the rest in the fridge cup "ready to eat". 2--DO NOT cut the bottom roots or green tops off! In a cup, on the counter, near a sunny spot with just enough water to cover the roots. Change the water every day. The ones on the counter will continue growing - not only will the green tops keep growing for several weeks, so will the roots! Cut off the older green tops, as the newer ones push them out of the way, and you'll have a bumper crop of Spring Onions to dehydrate, naturally! If you have the gardening space, you could also take the onions from the counter and re-plant those with new long roots in your container garden or outside plot. Spring onions in a cup on the counter won't last forever. In my wild experiments, the farthest they got was 3 weeks. I buy bunches of Spring Onions at the local Farmer's Market for 2 for $1. As you probably noticed, they are what I call "scratch n' dent produce" (I'm a frugal minimalist, remember?). Between stretching and drying, I get 1/2 again as many as I paid for, including plenty dried for use later in chip dip, soups and Spring Onion Cheddar Drop Biscuits! Leave me a comment down below and let me know how it worked for you, or if you have any great uses for dried spring onions, please share! Blessings in Christ, Rose Marie | 
AuthorRose Marie is an urban apartment dweller, seeking a simpler & more affordable life, through minimalism, frugality & urban homesteading, all while living in a 360 square foot apartment home with her trained cat companion, the ever affectionate Valentino. 
ArchivesCategories
|
 RSS Feed